Pages

Wednesday, September 24, 2014

International Quilt Festival, Houston, 2014


I'm so excited!!  Only a few short weeks til the International Quilt Festival in Houston, Texas!! ( Oct 30-Nov 2, 2014-  but note that classes start Oct 27 )


Yay!!  I've been busy putting together kits for my students- everything from instruction sheets to fabric circles and pin backs!  There will be extra kits for purchase during the class in case you'd like to make more than one project or buy some for gifts :)

Want to come take a class with me?  Here's the lineup-  and sign up HERE.


Harlequin Star Pillow  #139  
Mon, Oct 27, 9-12 

Take your projects to the next dimension!
This extraordinary 3-D star-shaped pillow will be the whimsical focal point of your room. Enjoy quick construction with the new fusible 2.5'' grid. Make it in class, stuff it at home!

Sign up HERE.


Razzleberry Pincushion  #159  

Mon, Oct 27, 2-5 pm
It's a jumbo 6'' pincushion with a shape reminiscent of a berry- but flip it over and it's also a bowl!  Super novel and giftable!

Sign up HERE.


Fabric Orchid Brooches Sampler  #243 
Tues, Oct 28 9-12 

Learn to make three types of fabric orchids phalaenopsis, cymbidium, and slipper. Versatile and unusual, they look fabulous on jean jackets, purses, and wedding keepsakes- even on art quilts!

Sign up HERE.


Camelia Gigantus Brooch   #263
Tues, Oct 28 2-5 pm 


These oversized ombre-shaded fabric flower brooches look great on everything from a jean jacket to a purse- or how about adorning an art quilt? Perfect for gifting!

Sign up HERE.


Hope to see you there!!

Tuesday, August 26, 2014

The Olmalaika Home and it's Angels


If you're wondering, Olmalaika means 'angel' in KiMaasai :)  With that as an intro you KNOW this is going to be a good story…

Today I want to tell you about the Olmalaika Girls' Home in Kenya.  To do that, I'll have to rewind a bit to about 6 months back.

A kind woman named Gwenyth contacted me on Facebook.  She was a La Todera pattern customer, and also a supporter of the Olmalaika Home for Girls.


The Home is a refuge for girls that are facing early childhood marriage and/or female genital mutilation in Kenya.  That's right. Genital mutilation is still being practiced in many parts of the world.  Girls are being married off as young as 6 years old.  And to make them more 'desirable' brides, they are mutilated.  I shudder just typing that term.

Kim DeWitt and her girls

The Olmalaika home was started by Kim DeWitt- you can read more about the story, which is a fantastic and super heart warming one- here.

Back to Gwyneth in Australia.  Gwyneth is a friend of Kim, and a frequent volunteer at the home.  Gwenyth had the idea to teach the girls a craft to give them a skill and something to sell the create an income stream for the home.

Of course I was really excited about this idea, and had to come up with the perfect pattern.  It had to be easy for all skill levels, cost effective to make, and small enough to transport for purchasers of the future ornaments. The Olmalaika Angel Ornament pattern was the result!

Finished Olmalaika Angel Ornament

Olmalaika Angle Pattern cover

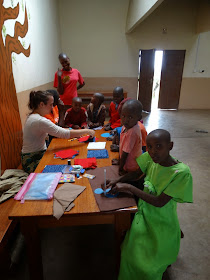
This past July, Gwyneth brought the pattern and supplies to Kenya and helped teach the girls how to make them!  Look at these precious photos:


Olmalaika Angel Ornaments made in African fabrics!

They are planning to make the angels to sell as souvenirs for visitors to the home, as well as to be sold in the in the home countries of the visiting volunteers.

To continue my own involvement in the project, I'm selling the Olmalaika Angel Pattern and donating the proceeds directly to the home.  If you'd like to buy a pattern of your own, they are available here.
Of course the pattern can be customized with your choice of fabrics, floss colors, etc.

Olmalaika Angel Pattern cover


So why not get your own pattern and make Olmalaika Angels for everyone on your holiday list?  You'll be crafting for your loved ones as well as helping some beautiful little girls in Kenya :)

Wednesday, July 23, 2014

Quilting Arts TV 1400 Series

Hi everyone!
It's my honor to take a turn on the Quilting Arts TV Blog Tour for series 1400!

What a thrill to be included in this series, the first of Quilt Arts TV's new host, Susan Brubaker Knapp! Susan is an amazing artist in her own right, and is lending her broad talents in quilting and hosting to this well loved show.


Susan Brubaker Knapp and I

Want to know when the show will air in your area?  Go to www. and type in your zip code to see when series 1400 series will be shown near you.
Wanna see previews of the episodes?  Check out this link.

Don't wanna wait for the episodes to air?  No problem!  Buy the series in DVD form and watch them anytime you like!  Live outside of the US?  This is the option for you!  All of the projects and techniques are fab!!


Buy your DVD here


I'm so excited about the projects I developed to be featured on this series!

The first one is the Pinwheel Present Pocket on Episode 1413.  (Click for preview.)

Perfect for little gifts like cash, gift cards, earrings etc.  And best of all, it's reusable!


The second project, featured on Episode 1409, is the Buttercup Brooch.   (Click for preview.)

Who doesn't love a buttercup?  You'll learn several key fabric flower construction tips.  Make a whole field-ful!

Buttercup Brooch


Thanks Quilting Arts TV for a great experience, new friends, and new opportunities to share!

Want a lil bit more on the filming process?  Check out this previous post.


Here’s the bloghop schedule, plus you can also read all about it on Quilting Arts Editor Vivika DeNegre’s blog here. Keep coming back here to click on the appropriate link for each day.

  • July 20: Sarah Ann Smith (sarahannsmith.com/weblog)/

Friday, June 20, 2014

My New Book- Adventures in Fabric, La Todera Style!

I feel like I've been holding my breath-  I'm so proud to announce the upcoming release of my first book! - Adventures in Fabric, La Todera Style


Release date: Nov 1, 2014

 To give you an idea what the book will contain, I'm lifting the description that Stash Books (my amazing publisher) has given my tome….


"This festive collection from designer Julie Creus brings together bright fabrics, ingenious construction methods, and a large dash of whimsy to make 3-D effects like you’ve never seen before in fabric. Create usable art with ingenious new techniques for fabric folding, fusing, weaving, and thread wrapping. Get 20 vibrant projects—jewelry, table decor, pillows, sewing accessories, holiday decorations, children’s softies, and balls—for the price of 3 individual La Todera patterns. Scrap-friendly projects are usable as well as beautiful—and they’re fun to make. Julie’s inventive methods make the sewing easy, whether you are a beginning or expert sewist."

This book has been so long in the making.  I've been stashing away key designs in a notebook, just waiting for the right time in the life of my business to mold into a book.  So it's chock full of choice designs!  I collaborated with fabrics from only my very favorite designers.

One of the parts of the book I'm most chuffed about are the endorsements from three of my favorite people:

Kaffe FassettBrandon Mablyand Marcia Derse
(Every time I remember that bit, I think I must be dreaming.)  

I left it all on the dance floor with this book. I'm exhausted, exhilarated- and can't wait to do it again!!

Thanks to all of the people that helped make this possible. My heart is full. :)
I couldn't have asked for a better publisher, editors, designers, marketing team.  Family and friends- all so supportive and helpful, and understanding when I was crazed with deadlines and details. :)

I'll leave you all with an image from one of my very favorite projects in the book, the Peacock Pincushion.  This pattern is dedicated to Amy Marson, the publisher of C&T Stash books, a woman I admire ever so much, and with whom I share an inexplicable, crazy love of peacocks :)


The Peacock Pincushion, one of my fave projects in 'Adventures in Fabric'

More will be revealed…


Friday, June 13, 2014

My home girl, Cheryl Sleboda and her new DVD on fabric manipulation!!

So I met Cheryl Sleboda on my previous adventure in Ohio, taping segments for Quilting Arts TV.  (See blog post. ) Fortuitously, Cheryl was also there.  I was first drawn to her midwestern friendliness and cool hair (that's her below.)

Cheryl Sleboda, mistress of fabric manipulation.  Like that Tshirt?  That's her own rad design!! Get your own here.

We got to talking in the green room-and what's her specialty??  Fabric manipulation!!!!  OMG.  I don't think I've actually met ANYONE as crazy about fabric manipulation as I am!!  Two peas in a (fabric) pod, I tell you.

It turns out Cheryl was at the studio to film her new DVD, "Heirloom Sewing Techniques for Today's Quilter ."  When she asked me to be on her blog hop to review it, I wasted no time in saying YES!!!! Yahoooey!!!!

Get yours here now.

So, a lil' bit about the DVD.  It was produced by Interweave, a leader in the industry for quilting videos, TV programs, and quilting magazines.  Ergo, the production is amazing.  You can order it here:

And you can get it as an instant download or a hard copy DVD.  Your choice.


On to my thoughts.

This video is beautifully shot on a beautiful set.  The camera just loves Cheryl and her beautiful self!  She is engaging, speaks with confidence, and dangit, I just love her midwestern accent (being from Chicago myself, I can't help but find it soothing...)

Miss Manipulation (aka, Cheryl Sleboda,) looking fab.

The video is all about my very favorite subject- fabric manipulation techniques!!!  It's just fantastic!

 Check out some of the techniques show in the video- how yummy are these???


Cheryl first talks about what materials are best for the techniques she discusses.  My fave tool she talks about is her very own marking ruler!  What a genius idea and such a looks so simple to use!!  You can tell that this girl is part fabric romantic and part scientist!

Want your own?  Click here.

Next, Cheryl goes on to talk about some heirloom hand smocking techniques. Some are using her grid, and others use different marking tools to do say, circles.  Although these are age old techniques,  Cheryl's method and fabric choices make them thoroughly modern.

The next section talks about making fabric look 3-D using your sewing machine.  Who knew?  As I was watching this section,  I was getting all kinds of ideas about how to use these methods for details not only on quilts, but on handbags, garments, etc.

My favorite section of all was what I call the eye candy section- where Cheryl showed several quilt blocks, mini quilts and a fab round smocked pillow, all which used the techniques outlined in the DVD.  If anything, I wish this section was longer!  Cheryl's projects are so intriguing that I could just look at them all day long!  I would advise to watch this end section first, so as you are watching the instructional sections of the video, you can start imagining how you would use these methods for your own fun creations.

So my review is a double thumbs up!!  If you'd like your own copy of this DVD, hop on over to ___
To find out more about Cheryl and her antics, check out her website  www.muppin.com.  You can find all her deets there, including her bio, and links to her blog and Facebook page (don't forget to like it!)

How about a GIVEAWAY!! Cheryl has generously donated an Heirloom Smocking Template ruler!


See the giveaway details on the La Todera Facebook page!!  (Limited to US participants only)

Want to see more reviews on Cheryl's DVD?  Check out the links to the other participants on this fun blog tour!!

June 9 – Susan Brubaker Knapp – http://wwwbluemoonriver.blogspot.com/
June 10 – Maddie Kertay – http://www.badassquilterssociety.com/
June 11 – Faith Jones – http://www.freshlemonsquilts.com/
June 12 – Lynn Krawczyk – http://smudgedtextilesstudio.com/blog/
June 13 – Julie Creus – http://www.latodera.com/blog
June 16 – Catherine Redford - http://catherineredford.com/
June 17 – Megan Dougherty – http://thebitchystitcher.com/
June 18 – Pokey Bolton – http://pokeysponderings.com/
June 19 – Jamie Fingal – http://www.jamiefingaldesigns.com/
June 20 – Cheryl Sleboda – http://muppin.com/wordpress/index.php/blog/


Thursday, May 8, 2014

The Quilt's Got Back!

So I just finished a rather laaaaarge quilt top, and decided on this yummy print for the backing:


'Sinister Swarm' from the Field Study collection by Anna Maria Horner for Free Spirit

Since this is regular width (40-42'' wide) quilting fabric, and my quilt is much wider than that,  I needed to piece the back.

And, of course I wanted those ginormous butterflies to  match up nice and neat when I pieced the backing.  Here's how I did it and you can too:

First off, buy extra fabric.  I knew that the butterfly pattern repeat was going to be big, so I bought an extra ½ yard more than I normally would for a backing.

Wash and dry your fabric.  I like to air dry my fabric so the edges don't get all gnarly.

Fabric drying on the pool deck.  My friend Michele calls it 'patio candy'  :)

Cut one length of fabric the length of your quilt top, plus about 4 inches extra on the top and bottom. For example, if your quilt top is 75'' long, cut your fabric piece 83'' long.  Use your rotary cutter and ruler to neatly cut off one the selvage edges.  Iron that cut edge under ½''.  Set aside.

Lay remaining piece out on a flat surface. I recently started using our sadly neglected pingpong table for this purpose.  No more crawling around on the floor!!

Now lay your first piece of fabric next to the first one, matching the design on the folded under edge to the design on the second piece of fabric nearest to it's edge.  Use pins to hold this edge in place about an inch or so away from folded edge.

(You may have realized by now that your seam allowance will be ½'' on your pieced fabric.  That may be larger than you are used to, but the extra width will give you extra 'ground' for gluing in the next step.  And then later when you press the seam allowance open, the extra surface will make that step a bit easier too.)

Use a washable glue stick, (yep, just steal one from your kiddos- doesn't have to be a special quilting kind.  In fact, the cheaper the better for this use) and glue that seam down to the second piece of fabric.  Do a few inches at a time and take your time to match up the designs before sticking it down.  Use plenty o' glue- this seam is about to get man-handled in the next few steps, so make sure it's stuck down but good.  The glue stick will wash out later anyways.  The pins you used in the previous step should hold everything in place for you.  Let glue stick dry thoroughly.


Glue folded under edge fabric (left) to match pattern on first length of backing.

Now remove all the pins and fold back seamed side.

Replace pins, now perpendicular to seam.  I pin every 2 inches or so, just in case.

Take the backing to your sewing machine, and sew a seam directly on top of the fold line.

Fold fabric back and sew directly on pressed line.  Cinchy.

Use your rotary cutter to trim bottom layer of fabric even with top seam.

Now pry the seam open.  The cheap, washable glue stick is kind of brittle when dry, so it shouldn't be too difficult to separate.  Iron the seam open.


Trim larger side even with smaller side of fabric.

Trim with rotary cutter.

If your quilt is gargantuan like mine was, add another panel of fabric using the same method.

Et voila, perfectly matched seams!

Seam- all but invisible- can you find it?

Ps, you can use this method for other stuff too when you need to match patterns, like for making wide curtains or upholstery projects like headboards.  Handy, non?

Wednesday, April 16, 2014

The Protea Pincushion

No secret- I've got mad love for weird flowers.  The more exotic the better!

When I come upon a species I haven't seen before, I can't help it-  I've got to research it.  I've often got the latest crush on my kitchen counter available for viewing every time I walk by.  I obsess until I've figured out for myself what sets that particular flower apart from all it's other cousins in the flower world.

And so it was with the King Protea.  The first time I saw one in person was at Whole Foods.  (FYI, Whole Foods has an amazing floral section- I often go just to snap pics.  And yes, they know me and think I'm nuts.)


I went in for quinoa, and came out with a King Protea bouquet. Typical.

So according to my research, King Protea are native to South Africa.  My sources say they are the national flower.  I like to imagine that there are fields of King Protea just covering the countryside like the poppies in the Wizard of Oz.  Ok, that's probably an exaggeration, but hey, a girl can dream!

So after much thought, I decided that the King Protea has the following distinguishing features-

  • A velvety, cone shaped center (you could use velvet, minkee fabric, or velour)
  • A couple of layers of delicately shaded, pointy petals (mmmm, I'm thinking ombre fabric…)
  • 6 inches across or larger (go big or go home.)


Fast forward through the mental gymnastics how to make this happen in fabric, and boom, The Protea Pincushion Pattern! :

Made with Kaffe Fassett's Kim fabric in 'red' with periwinkle velvet center.

Actual pattern cover
Made in Kaffe Fassett's 'Kim' fabric in blue with green velvet center.

Made with Kaffe Fassett's 'Mirage Stripe' fabric with turquoise velvet center.

I like to add beads to the inner petal tips.  Little crystal ones look kind of like dew drops, don't you think?


Want to know one of the best things about this new pattern?  You can use my fave new toy- the Accuquilt Go fabric die cutter- to make this Protea come together even faster!!

I first met up with the Accuquilt peeps at the Houston Quilt Market.  Yeah, I'd heard of fabric die cutters, but it wasn't until I tried one myself that I realized the potential with my patterns…
The dies are designed with the quilter in mind.  Lots of different circle sizes, 2 ½'' strips and squares, etc. etc.

The Protea Pincushion particular pattern uses LOTS of circles.  You can definitely make the Protea Pincushion with the circle templates included in the pattern.  But you can't image what a time saver die cutting them is!!

And SO fun.  I swear that crank just invites volunteers.  I have named my Accuquilt cutter 'Tom Sawyer'- all I have to do is set it up, and the kids come running volunteering to cut all the shapes I need!  

The Accuquilt peeps were kind enough to send me the Accuquilt Go to check out.  This is the one I have:


Want your own die cutter?  Want to check out the gazillions of dies available?  Hop on over to Accuquilt.

I love this gadget so much that I will be editing past (and future!) patterns with optional die cut instructions!!

Want your own Protea Pincushion Pattern?  Go here :) 

Happy flower crafting!